How to Make a Sprite Sheet: The Complete Beginner's Guide
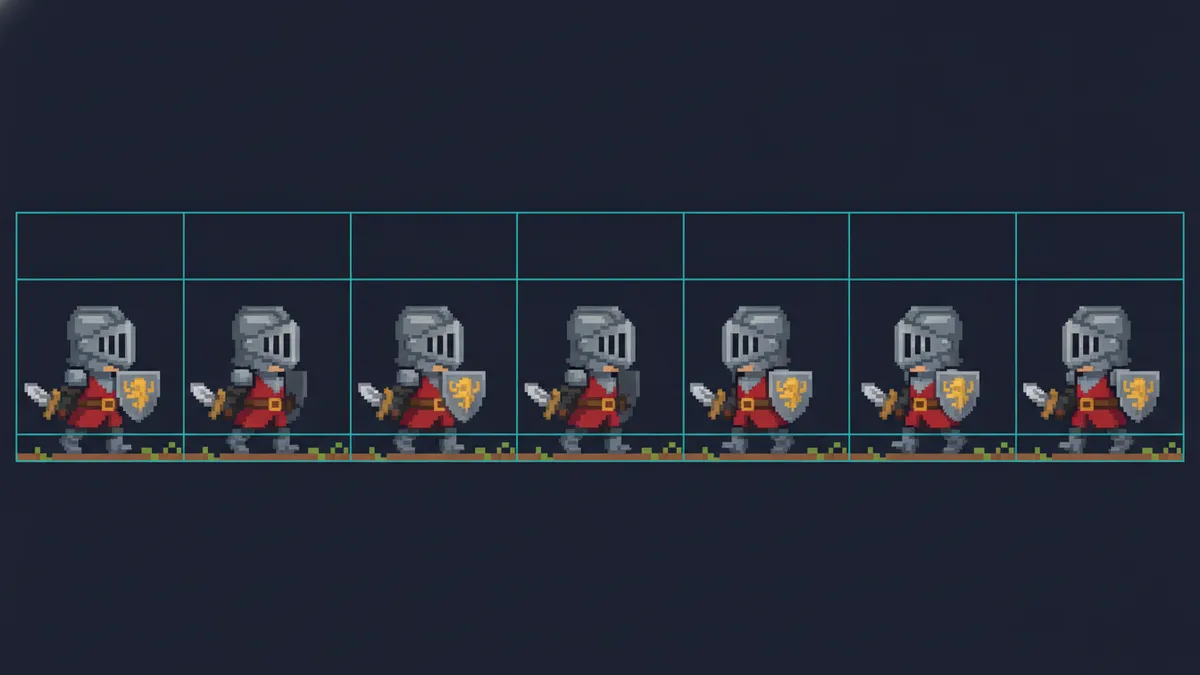
This guide walks through how to make a sprite sheet from nothing: what a sprite sheet actually is, the three numbers you must decide before you draw, how to draw and export the frames in Aseprite, how to pack loose frames into one image, and the exact import settings for Unity, Godot, and RPG Maker. It ends with the mistakes that make a sheet look amateurish and how to avoid every one of them.
If you already have the frames and just want them packed, jump to packing frames into one sheet. If you want the frames drawn for you, the AI sprite creator at the end does that.
What is a sprite sheet?
A sprite sheet is one image that holds every frame of an animation, laid out in a row or a grid of equal-sized cells. Your engine draws a window over one cell at a time, steps the window along, and the character walks.
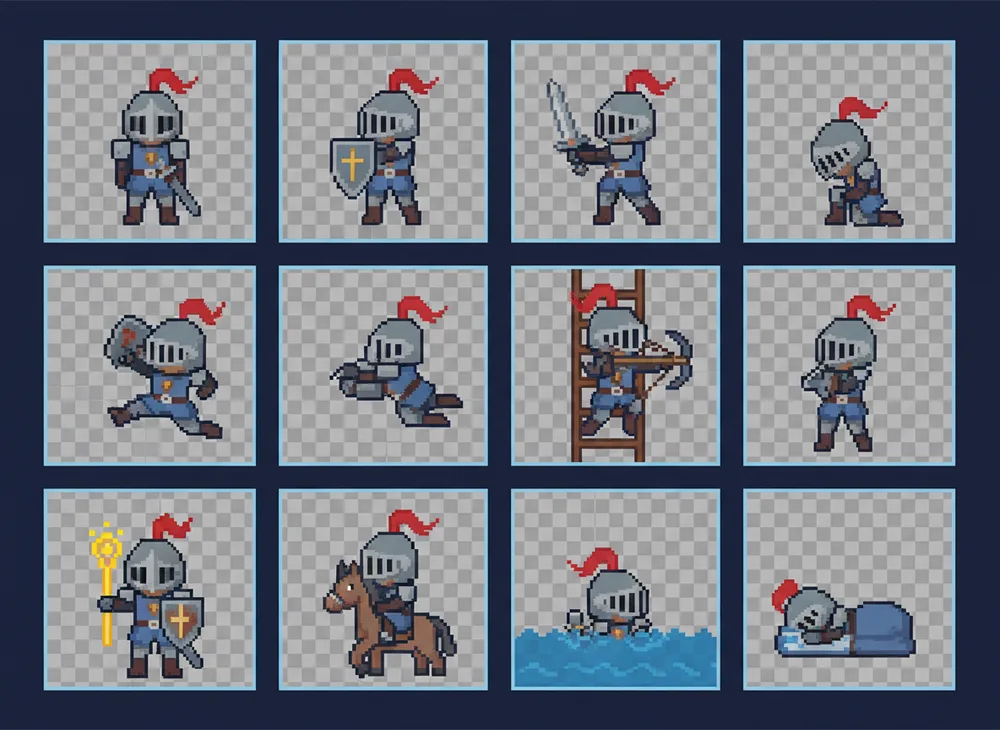
The reason to bother, instead of shipping eight separate PNGs, is that the GPU binds one texture instead of eight. On a 2D game with forty animated entities on screen, that difference shows up in the frame time. It also means one file to version and one file to swap when the art direction changes.
The format is settled: uniform cells, no gaps, one file. What isn’t settled, and what beginners get wrong, is the handful of numbers you pick before you start.
Step 1: decide the numbers first
Three decisions shape everything downstream. Get them right now and the rest of this tutorial is mechanical. Get them wrong and you’ll redraw every frame.
Frame count: 6, 8, or 12
This is the decision that most changes how the animation feels.
- 6 frames is enough for a walk cycle if the character has simple legs and the game reads at a distance. Top-down RPGs with 32px sprites have shipped on 4 frames for decades and nobody noticed.
- 8 frames is the workhorse. Contact, down, pass, up, twice, mirrored. It gives you a proper weight shift and divides cleanly if you later want a 4-frame low-detail version.
- 12 frames starts to look like animation rather than motion. Use it when the character is large on screen, when a cape or hair needs to trail, or for a one-shot the player will actually watch: a death, a spell cast, a transformation. On a walk cycle that loops for six hours of playtime, twelve frames is mostly wasted work.
A rule that holds up: if the loop plays constantly, spend your frames on readability. If it plays rarely, spend them on smoothness.
Cell size: pick from the screen backwards
Cell size is the pixel dimensions of one frame. Common choices are 16, 32, 64, 96, and 128.
Don’t pick this by “how detailed I want it to look.” Pick it by how many pixels the sprite will occupy on the player’s screen. Take a 1920×1080 target. If your camera shows 30 tiles across, each tile is 64 screen pixels. A character one-and-a-half tiles tall wants roughly 96 pixels of art. Authoring at 32 and scaling up 3× gives you the chunky look on purpose. Authoring at 128 and scaling down gives you mush, because downscaling pixel art destroys the hard edges that make it pixel art.
The failure mode to avoid is a display scale that isn’t a whole number. 32px art at 2× is crisp. 32px art at 2.4× shimmers on every diagonal, and it will bother you forever once you see it.
Perspective: choose before the first frame
Four perspectives cover nearly everything in 2D:
- Side view: pure profile. Platformers, fighting games, endless runners. One direction, sometimes mirrored.
- Top-down: the camera looks straight down. Twin-stick shooters and roguelikes. Usually four directions.
- Grid RPG: the three-quarter view where the character faces the camera but moves on a grid. This is the RPG Maker look. Four directions.
- Isometric: the diamond three-quarter view. The most expensive, because a walk cycle usually needs eight directions.
Perspective isn’t a filter you apply afterwards. It determines which limbs are visible, where the shadow falls, and how many directional variants you owe yourself. A side-view character needs one walk cycle; a grid RPG character needs four.
Step 2: draw the frames in Aseprite
Aseprite is the standard tool for pixel-art animation and the workflow below is the one most sprite artists use. Any editor with frames and onion skinning (Piskel, Pyxel Edit, LibreSprite) works the same way, including the free pixel art maker on this site, which runs in the browser with nothing to install.
- Create the canvas at your cell size. File → New, then set width and height to the cell size you chose above (for example 32×32) with a transparent background. Do not draw on a larger canvas and crop later; the cell size is the contract with your engine.
- Draw the contact pose. Frame 1 is the character with one foot forward and touching the ground. Nail the silhouette here, because every other frame is a variation of it.
- Add frames. Frame → New Frame (or Alt+N) duplicates the current frame so you can nudge rather than redraw. Build the walk as contact → down → pass → up, then repeat mirrored for the other leg.
- Turn on onion skin. View → Show Onion Skin overlays the previous and next frames as ghosts. This is how you keep the head at the same height and the feet on the same line across frames.
- Preview the loop. Press Enter to play. Watch the feet and the top of the head. If either bobs unevenly, fix it now while it’s one frame and not a sheet.
- Export the sheet. File → Export Sprite Sheet (Ctrl+E). In the Layout tab pick Horizontal Strip for a single row, or By Rows with a fixed column count for a grid. In the Borders tab, leave Trim off (uniform cells matter more than a tight bounding box) and add 1–2 px of Spacing if your engine filters textures. In the Output tab, enable JSON Data if you want frame rectangles for engines like Phaser.
The export gives you a single PNG with every frame in equal cells. That’s your sprite sheet. If you drew in a tool that only exports separate images, the next step packs them.
Step 3: pack the frames into one sheet
Plenty of workflows end with a folder of loose PNGs: walk_01.png through walk_08.png from a sprite pack, frames rendered from a 3D model, or output from a generator. They need to become one file with uniform cells.
You can do this by hand in any image editor: make a canvas of columns × cellWidth by rows × cellHeight, then place each frame at an exact multiple of the cell size. It works, and it’s tedious and easy to get off by one pixel.
The faster route is the free sprite sheet maker on this site. Drop the frames in, and it sorts them by filename, sets the cell to the largest frame, aligns every frame on a shared baseline, and gives you a PNG plus the cell size to type into your engine. Nothing is uploaded; the packing happens in your browser. If the animation you have is an animated GIF rather than loose frames, the GIF to sprite sheet converter extracts every frame and exports them as one PNG sheet.
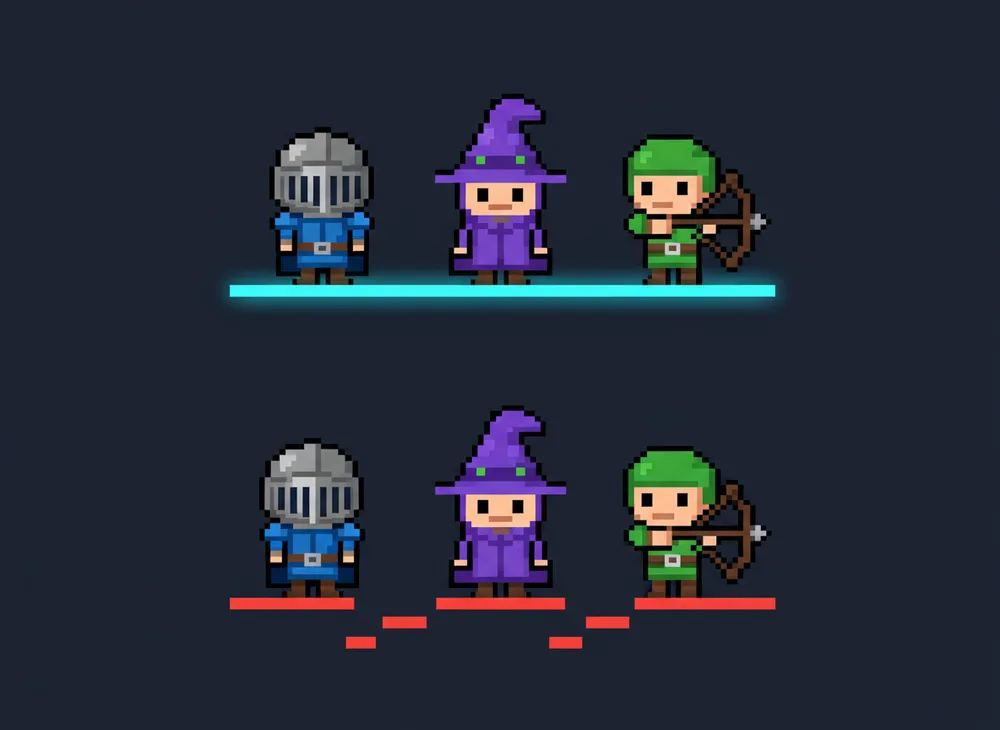
Whichever route you take, check two things before moving on: every cell is exactly the same size, and the character’s feet sit on the same line in every frame. The second one is invisible in a still image and obvious the moment the animation plays.
Step 4: import the sheet into your engine
Every engine wants the same thing from you: a sheet where every cell is the same size, with no gaps unless you tell it the gap size. Here is where the settings live.
Unity
- Select the PNG. In the Inspector set Texture Type to Sprite (2D and UI) and Sprite Mode to Multiple.
- For pixel art set Filter Mode to Point (no filter) and Compression to None. The default bilinear filter is what makes pixel art look blurry, and it catches everyone once.
- Set Pixels Per Unit to your cell size so one cell equals one world unit, then click Apply.
- Open the Sprite Editor, choose Slice → Grid By Cell Size, enter your cell width and height (and padding if you added spacing), and slice.
- Drag the resulting sprites into the Scene together to create an Animation Clip, or build one in the Animation window.
Godot 4
- Add an AnimatedSprite2D node and create a new SpriteFrames resource in its Sprite Frames property.
- In the SpriteFrames panel click Add frames from a Sprite Sheet, pick your PNG, and set Horizontal to your column count and Vertical to your row count. Godot slices the grid for you.
- Select the frames that belong to the animation, set the FPS, and enable Loop.
- For pixel art open Project Settings → Rendering → Textures and set Default Texture Filter to Nearest. Also set the project’s stretch mode to
canvas_itemswith integer scaling so your 2× stays exactly 2×.
RPG Maker MV / MZ
RPG Maker is stricter than the other two because it does not let you choose the layout. A character sheet is a fixed grid:
- Each character is 3 columns × 4 rows: three walk frames per direction, and the rows are down, left, right, up in that order.
- MV and MZ use 48×48 cells by default, so a single character block is 144×192 pixels.
- A standard sheet holds 8 characters in a 4×2 arrangement of blocks (576×384 pixels).
- Prefix the filename with
$to tell the engine the file holds a single character rather than eight. Prefix with!to disable the small upward offset the engine applies to characters, which you want for objects and doors.
Drop the file in img/characters/ and it appears in the character selector. If your frames aren’t 48×48, resize the cells (not the art) so the grid matches; RPG Maker will not slice an arbitrary sheet.
Phaser (bonus)
this.load.spritesheet("hero", "hero.png", { frameWidth: 32, frameHeight: 32 });
this.anims.create({
  key: "walk",
  frames: this.anims.generateFrameNumbers("hero", { start: 0, end: 7 }),
  frameRate: 10,
  repeat: -1,
});
Set pixelArt: true in the game config so the renderer uses nearest-neighbour scaling.
Five mistakes that make a sheet look amateurish
- Non-uniform cells. Trimming each frame to its bounding box seems tidy and breaks grid slicing completely. Keep the cells uniform and let the empty space be empty.
- Inconsistent ground line. If the feet sit at y=60 in frame 1 and y=58 in frame 5, the sprite bobs while walking. Every frame needs the same baseline.
- Transparent-edge bleeding. When the GPU samples a pixel at the edge of a cell, bilinear filtering pulls in the neighbouring cell and you get a one-pixel fringe of the wrong colour. Use point filtering, or add a 1–2 px transparent gutter around each cell and tell the engine the padding.
- Non-integer display scale. 32px art shown at 2.4× shimmers. Pick a camera size that gives you 2×, 3×, or 4× exactly.
- Drifting silhouette. The character gets subtly fatter or thinner across frames because each one was drawn from scratch. Duplicate frames and nudge instead of redrawing, and use onion skin every time.
Or skip the manual work
Drawing eight consistent frames by hand is a real skill, and it’s the reason most solo devs ship with placeholder art. The bottleneck isn’t the idea; it’s holding a character’s proportions, palette, and silhouette steady across every frame.
That consistency problem is what generation is good at. The SpriteGen sprite creator takes a text description, lets you pick the perspective, style, frame count, and cell size from this guide, and returns a finished sprite sheet with the frames already aligned on a uniform grid. It’s free to try, with no sign-up, and it takes about a minute. If you need a single still sprite, such as an item, an icon, or an NPC, rather than an animation, the AI sprite maker draws one as a transparent pixel-art PNG.
Whatever you use to make it, the numbers above are the ones to decide first. They’re much cheaper to get right at the start than to fix after you’ve built the animation state machine around them.
Ready to animate your character?
Describe your character, get a game-ready sprite sheet in minutes. Free to start.
Try Sprite Creator →